We all know about different turntables, mixers, and midi controllers for playing music, as well as speakers and amplifiers so our audience can hear it. What's often overlooked, however, is the stuff that goes in between: signal processors.
You'll find them in every sound booth at festivals and nightclubs, but that doesn't mean you can't use them for your own smaller events. With the right equipment it’s very easy to get big sound in any setting, even when you’re using a small sound system.
Here’s a couple of signal processing racks I put together, a two-rack set-up for a main room and single-rack set for a side room. Although they look different, they both have the same features:
- Compressor / limiter
- Sonic Maximizer
- EQ
- Stereo Reverb
- a power conditioner with pull-out lights
The only difference is size, quality, and expense.
I'll go into detail into each piece of gear later. For now, let's just take a look at each set-up.
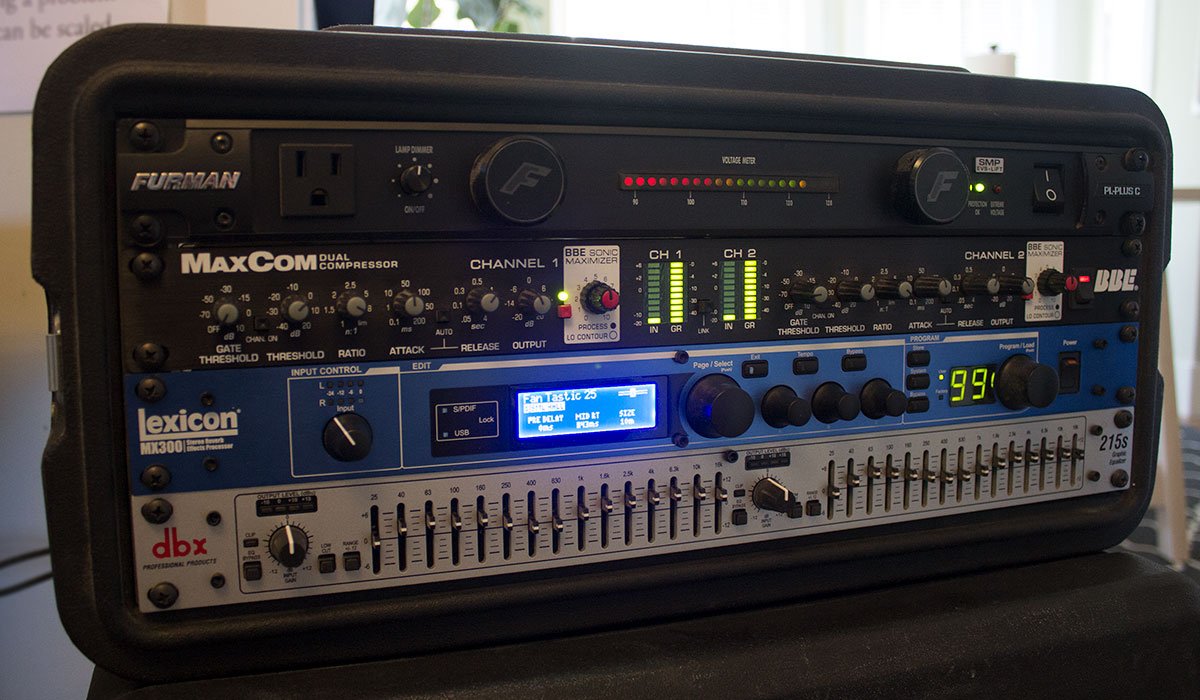
Single rack

- Case – Gator Case Pro Series Molded 4U Rack
- Power – Furman PL-PLUS C 15 Amp Power Conditioner (w/ LED Gooseneck Lamp)
- Compression / Polish – BBE MaxCom Compressor, Limiter and Gate with Sonic Maximizer
- Reverb – Lexicon MX300 Dual Stereo Reverb/Effects Processor
- EQ – DBX 215s Dual Channel 15-Band Graphic Equalizer
This single rack set-up is lightweight so it's very easy to carry and hook up.
The case is a 4-unit rack made by Gator Cases. 4-units makes it small and light enough to carry in one hand, but it's deep enough to lt you tuck long cables in the back. To save space, I only picked gear that took up a single rack unit. To save even more space, I found a compressor / Sonic Maximizer combo unit made by BBE, which means I got two processors in a single rack!
Double rack
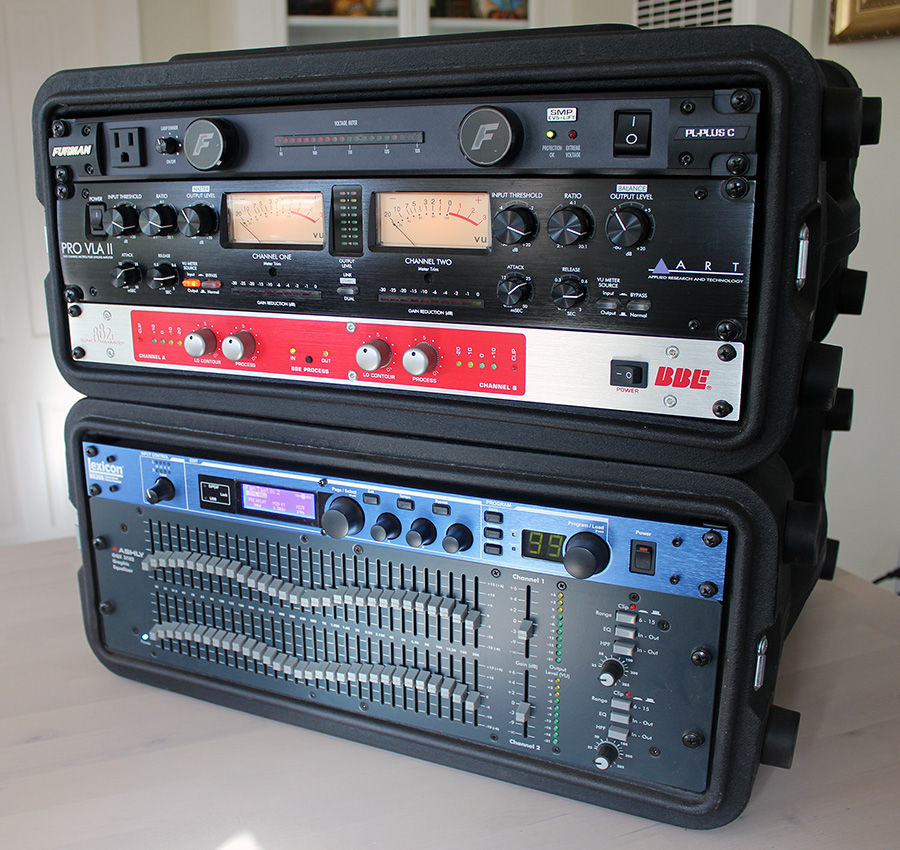
- Case – (2x) Gator Cases Pro Series Rotationally Molded 4U Rack
- Power – Furman PL-PLUS C 15 Amp Power Conditioner (w/ LED Gooseneck Lamp)
- Compression – ART Pro-VLA II Two Channel Vactrol-based Compressor
- Polish – BBE 882i Sonic Maximizer
- Reverb – Lexicon MX300 Dual Stereo Reverb/Effects Processor
- EQ – Ashly GQX-3102 2 Channel 1/3 Octave Graphic Equalizer
Although it's bigger, the double rack essenially has all of the same features of the smaller rack.
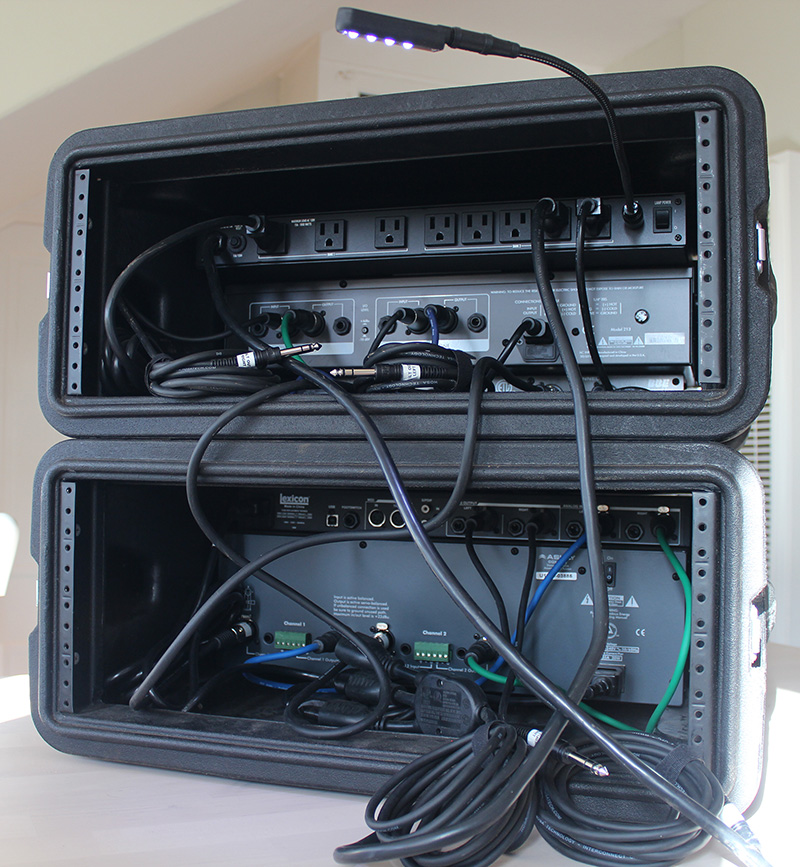
With a double rack, you'll need a couple of longer XLR cables to route audio between the cases. I also use a 3-plug PowerSquid to route power from the lower case to the Furman power conditioner up top.
Signal Processing
Although those racks look different, they both have the same types of processors and do the same thing. Each has a compressor / limiter, a Sonic Maximizer, an EQ, and a stereo reverb unit. The only difference is the quality and flexibility for certain features.
For example, the small rack has a compressor / Sonic Maximizer combo along with a basic EQ. In contrast, the double rack has a compressor with fancy VU units, a separate Sonic Maximizer, and a club-quality EQ. Both racks use the same Lexicon stereo reverb unit.
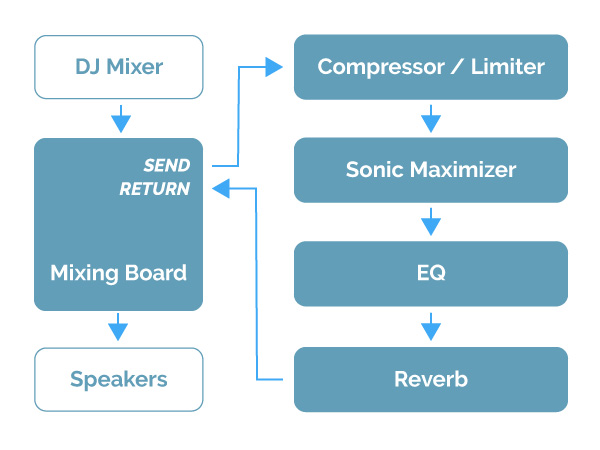
You'll want to route audio through each processor in the order shown in the diagram: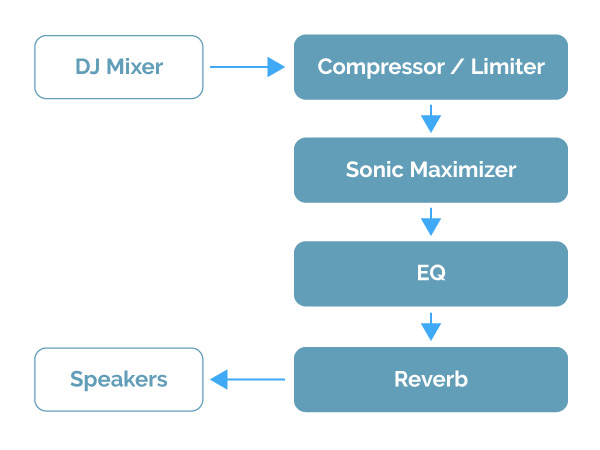
What does each processor do?
- Compressor / limiter sets an even audio volume
- Sonic Maximizer cleans up the compressed signal
- EQ tunes the signal to the space / venue
- Reverb adds ambience
Let's dig a little deeper.
Compressor / Limiter
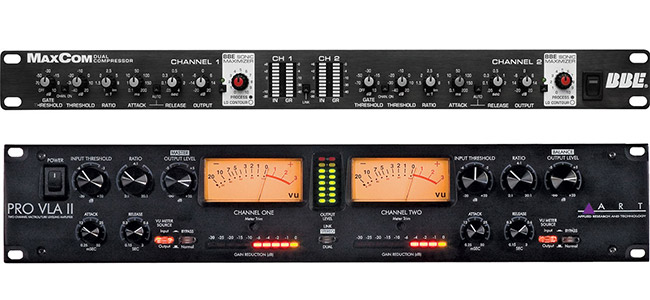
A compressor / limiter is designed to make the audio volume more uniform. If the music is too quiet, it’ll boost the audio and if the music is too loud, it’ll squeeze it back down (i.e. compress it). The compressor gives you control over how much it will squeeze down as it gets louder and even apply a hard limit (max volume) if needed.
This piece of equipment is essential if you let other DJs play on your system since they tend to bump the sound up and up over the course of the night.
EDM and bass music producers use compressors to make their tracks sound as heavy as possible without clipping the sound, so it makes sense you’d want to do the same thing and prevent an over-excited DJ from clipping (or blowing) the speakers.
Tip: one thing I really like about the PRO VLA II compressor is that I can customize the meters so the left meter displays the input volume and the right meter displays the output volume. This makes it easy to check levels throughout the night while walking by, instead of squatting and fiddling with buttons each time.
Sonic Maximizer
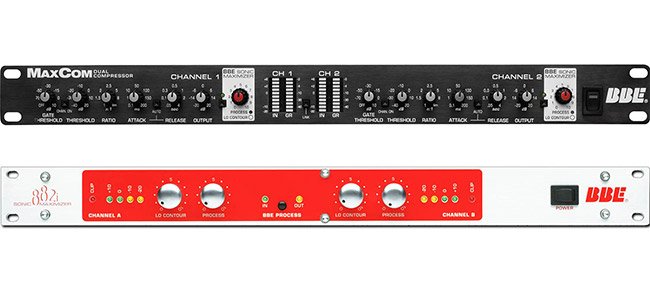
At first glance, a Sonic Maximizer simply makes audio sound richer and fuller. Many sound pros don’t like to use the Sonic Maximizer because they feel it’s a crutch and too easy.
The reason why it make music sound better is that it separates low and high frequencies so they each stand out clearer. While a compressor squeezes everything together, a Sonic Maximizer separates and opens the result back into unique, clearer sounds.
Tip: the MaxCom compressor with built-in Sonic Maximizer is pretty awesome since you get both in a single rack unit.
Equalizer
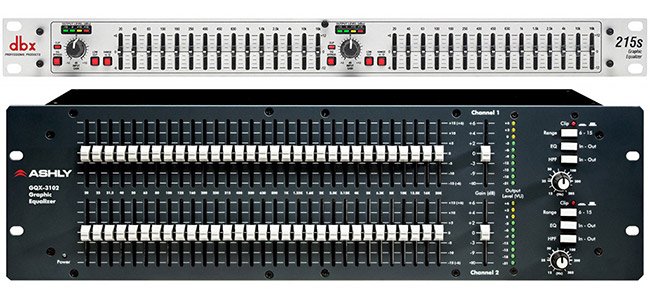
EQs are generally misunderstood. They’re commonly used for adjusting the bass and treble for music (like on DJs mixers). Professionally, EQ racks are for optimizing the sound for the space. Each venue, regardless of being indoor or outdoors, has different acoustics.
Pros use the EQ to add and remove levels for different frequencies so the space sounds balanced and clear. It’s also commonly used for identifying and reducing particular frequencies that could cause feedback when using a mike.
Tip: the best way to learn how to EQ is to pick a song or two (with vocals) that has excellent audio range and quality. Listen to that song over and over at home using the audio rack and make adjustments on the EQ until it sounds perfect (no rush, you’ll develop an ear for this over time). Then each time you set up at a new space, play the same song(s) on your system and tune the EQ until it sounds as perfect as you had at home.
Reverb
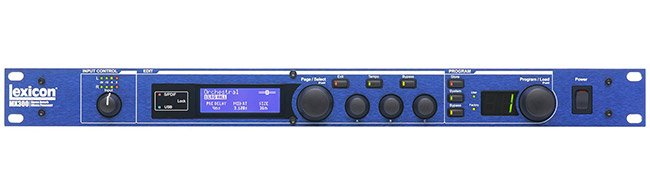
It seems silly to have a dedicated rack unit just for reverb, but it's the cherry on top. While all the other signal processors are dedicated to the clearest possible sound, reverb elevates it and makes any space sound like a basement, club, warehouse, or massive.
How sound from the speakers bounce off the walls is called reverb, so each of those venues has particular acoustics we’re used to hearing. This rack unit recreates that sound to create the same feeling and can make a small system sound like the biggest.
It doesn’t take much - a little goes a very long way. Applying 10-25% is plenty. You want just enough for a taste.
Tip: The Lexicon may seem like overkill but it has two essential features: it's stereo and it lets you save presets for different locations.
Extra Gear
Cases
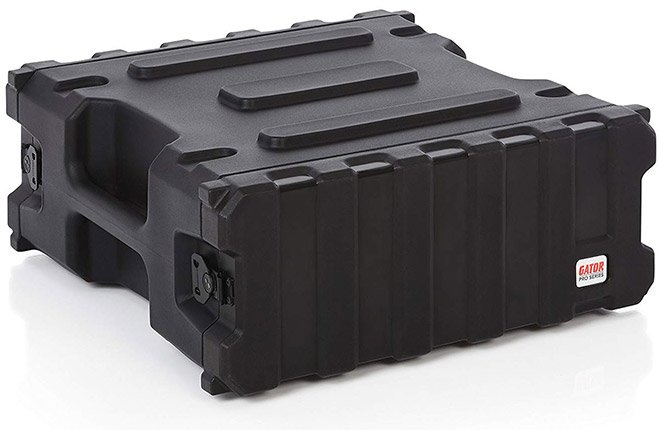
I recommend getting Gator cases with 4 unit racks (4U is four rows) because they’re easy to carry in one hand. A single 6U may be manageable with two hands, but 8U is too cumbersome to carry by yourself (just get two 4U cases).
The plastic Gator 4U cases are cheap yet dependable. Travel cases made with wood are more solid but also weigh a lot more. Unless your gear is doing a lot of traveling to events, don’t sweat travel cases.
Power Conditioner (w/ optional rear lamp)
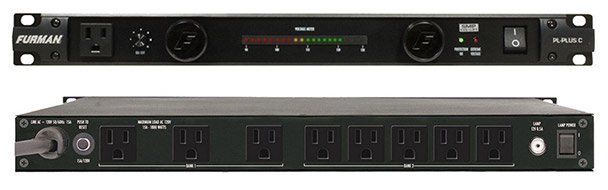
Essentially this is a convenient power strip with surge protection, plus a little more. The conditioner part helps when you’re using a generator (outdoor event) to even out power lows and highs.
I use the Furman PL-PLUS because it has a long power cord, dimmable lights in the front, and (best of all) because it can use an optional LED lamp arm in the back so I can find hard-to-see outlets in the dark.
Tip: the fader knob for the front lamps is also the on/off toggle switch (you push it).
Cables
Most of this gear uses XLR cables, but some (like the Sonic Maximizer) may only use balanced 1/4”. You can get XLR to 1/4” cables, just remember to get 2 each of male to 1/4” and female to 1/4” (and maybe a spare of each).
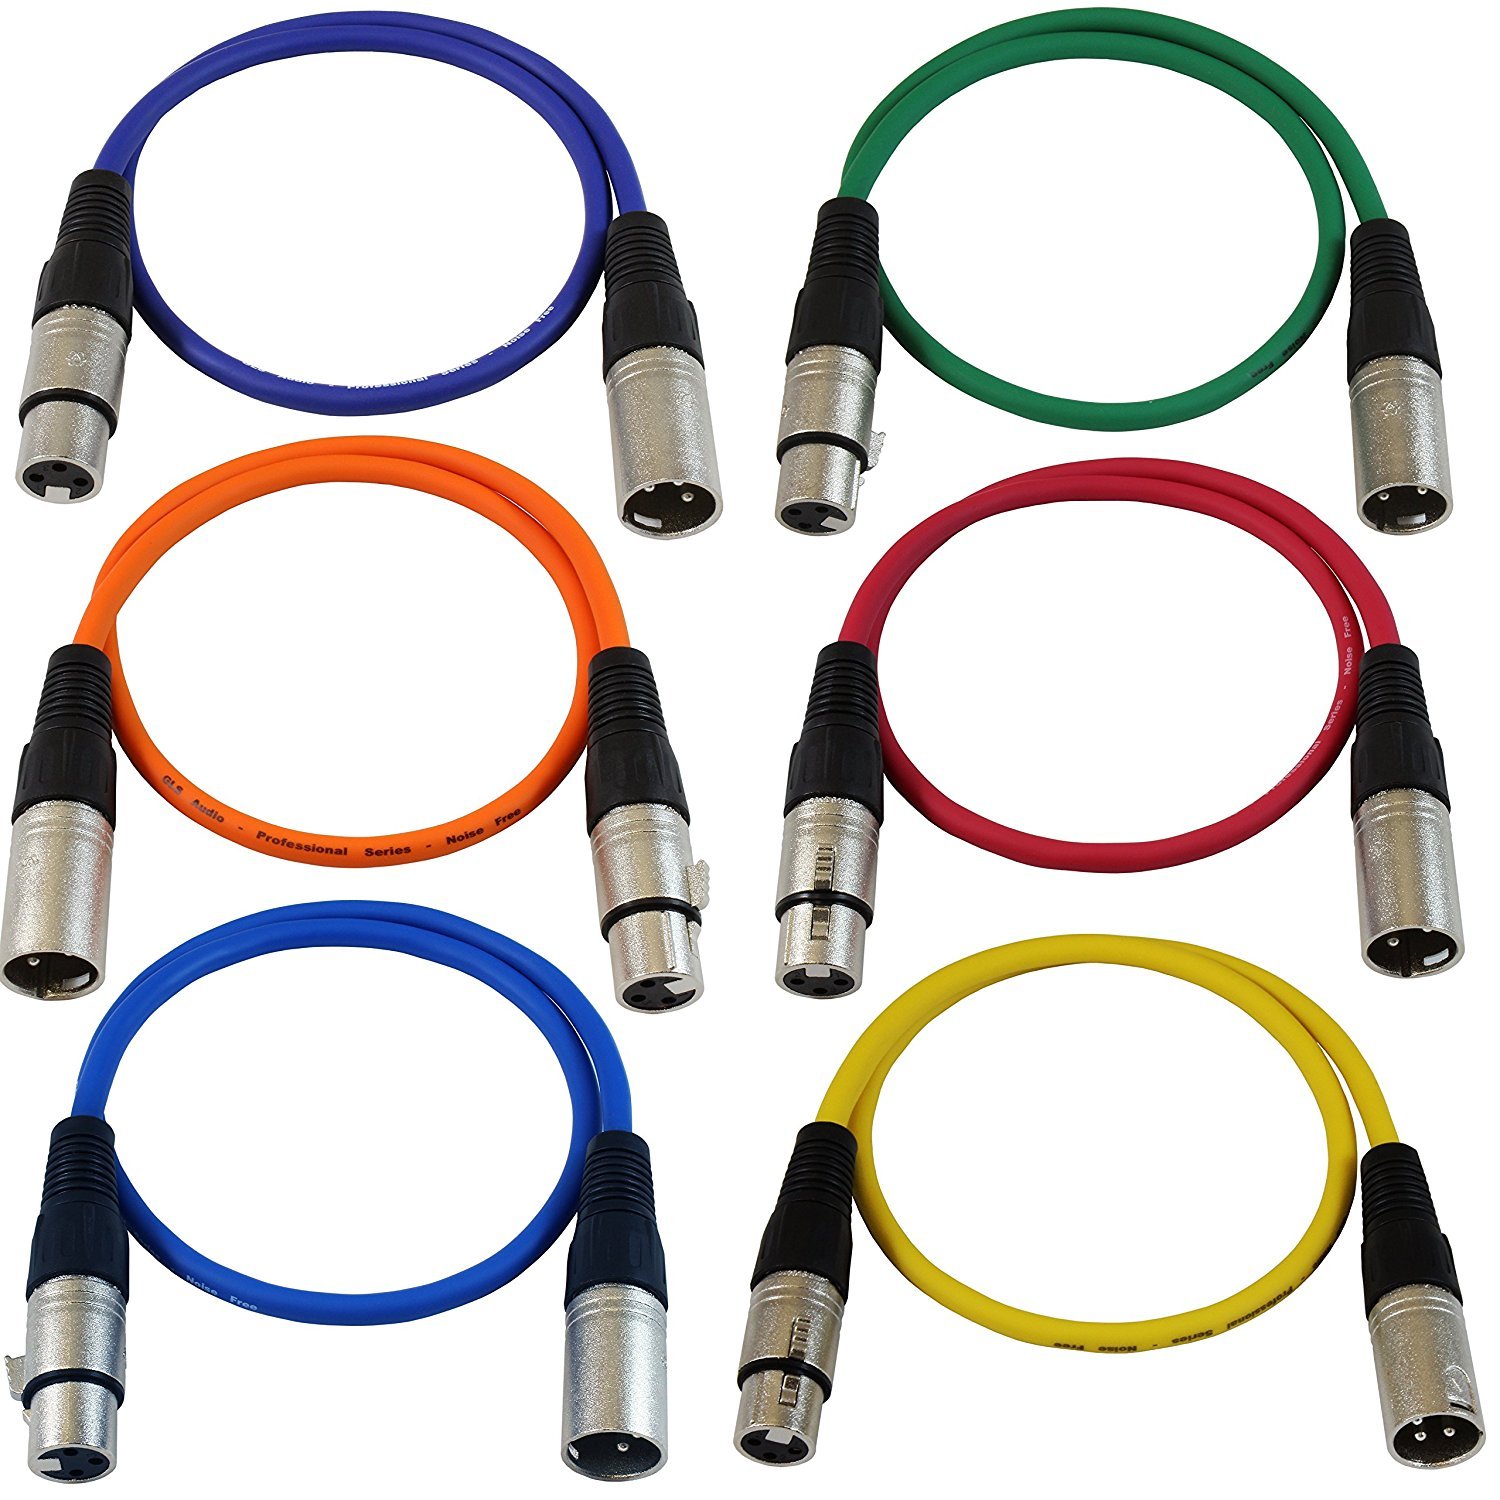
I highly recommend using colored XLR cables to connect the components inside each rack and mixing the colors up rather than matching. It’s much easier to follow where each cable goes if each one is a unique color.
To be self-sufficient, I recommend getting 10-15’ cables for connecting your rack to the main mixer. You’ll want to leave them connected inside the rack at all times. When tearing down, simply disconnect them from the mixing board only (not the racks!) and tuck them in the case — there’s plenty of room.
Depending on your routing (see later) they can be XLR-to-XLR, or 1/4” to XLR. Just be sure to stock some 1/4” to XLR adapters (5 male, 5 female). You’re responsible for connecting your rack to the mixer. The guy with the speakers should supply cables to the speakers.
Labels
I strongly recommend labeling cables that run out of the rack. Label them at both ends because at some point a friend will disconnect the wrong end (or both) during teardown. I use a label-maker and an extra layer of scotch-tape to make sure the labels stay wrapped.
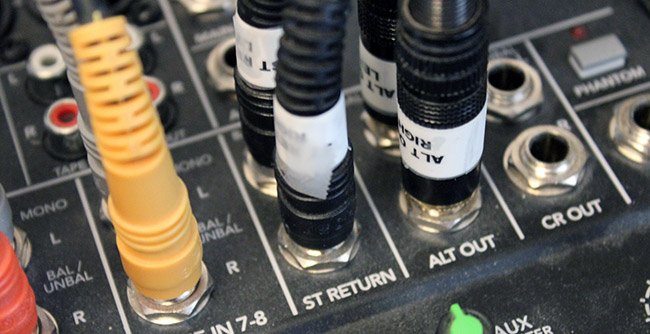
I tend to label each end where the cable goes, rather than what it does. For example, the 1/4” aux send cables are marked “ALT OUT LEFT” and “ALT OUT RIGHT” on the ends that go into the send plugs in the mixing board (see below).
Mixing Board
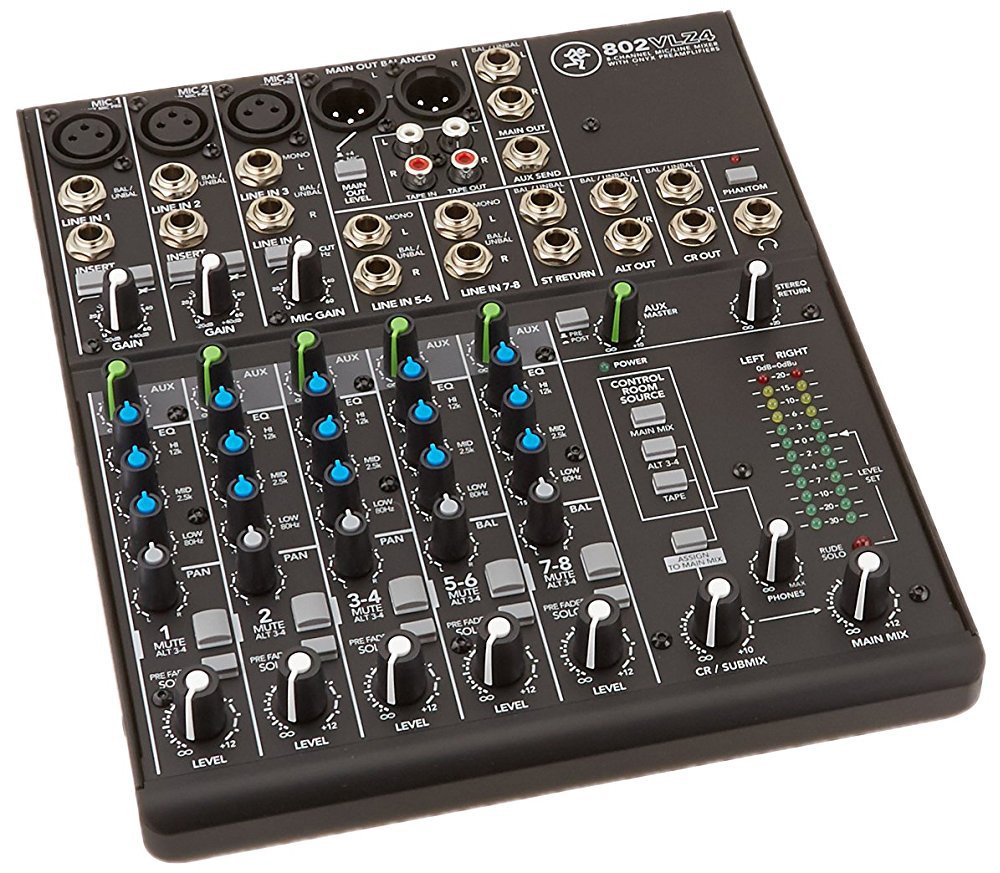
I like to use a separate mixing board for my set-ups and the Mackie 802 VLZ4 is excellent in a couple of ways. First, it fits exactly under my laptop stand, so I can use it at home on my desk. Second, it has aux send and return so I can toggle between direct sound and processed sound with the flip of a switch instead of redoing cables.
With this set-up I have four 10’ XLR to 1/4” cables running from the mixing board to the rack (two males, two females).
Links to Equipment
If you’re interested in picking up any of this gear, here’s Amazon links.
Final tip: If you want, you can buy one processor at a time. Start with a compressor / limiter and work down. The compressor is most important while the reverb is a nice extra.
Small Rack
- Gator Case Pro Series Rotationally Molded 4U Rack - https://amzn.to/2mo7nmw
- Furman PL-PLUS C 15 Amp Power Conditioner - https://amzn.to/2uHVE69
- BBE MaxCom Compressor, Limiter and Gate with Sonic Maximizer - https://amzn.to/2NW4B4s
- Lexicon MX300 Dual Stereo Reverb/Effects Processor - https://amzn.to/2LgboHP
- dbx 215s Dual Channel 15-Band Graphic Equalizer - https://amzn.to/2L43cLp
- Furman GN-LED Gooseneck Lamp - https://amzn.to/2K73wDG
Big Rack
- (2x) Gator Case Pro Series Rotationally Molded 4U Rack - https://amzn.to/2mo7nmw
- Furman PL-PLUS C 15 Amp Power Conditioner - https://amzn.to/2uHVE69
- ART Pro-VLA II Two Channel Vactrol-based Compressor - https://amzn.to/2uvqqQf
- BBE 882i Sonic Maximizer - https://amzn.to/2NUgNTc
- Lexicon MX300 Dual Stereo Reverb/Effects Processor - https://amzn.to/2LgboHP
- Ashly GQX-3102 2 Channel 1/3 Octave Graphic Equalizer - https://amzn.to/2NVR397
- Furman GN-LED Gooseneck Lamp - https://amzn.to/2K73wDG
Cables / Extras
- PowerSquid Jr. Outlet Multiplier - https://amzn.to/2M7F9Yz
- Colored XLR Cable Cords - 2 ft (6 pack) - https://amzn.to/2MawRPK
- XLR Cable - 3 ft (2 pack) - https://amzn.to/2KdPYGL
- XLR Cable - 15 ft (2 pack) - https://amzn.to/2M60KAs
- case screws - https://amzn.to/2LOd2AK
Mixing Board with Aux Send / Return
- Mackie 802VLZ4 Audio Mixer - https://amzn.to/2LAQPXy
- (2x) balanced 1/4 inch to XLR male - 10 ft - https://amzn.to/2K5SZsH
- (2x) balanced 1/4 inch to XLR female - 10 ft - https://amzn.to/2K6xXd7